
This post is for those that are shooting in semi- automatic settings .
– TV- or shutter priority
-AV – Aperture priority.
These settings are really still great , lets face it manual can be slow and difficult especially when your new to photography. You may have been asked to shoot an event , or you want to take lots of pictures quickly .
Semi- automatic settings will give you the time to concentrate on all the other aspects , like focus modes , composition, etc.
Exposure compensation is best for scenes that are dominated by very light or very dark conditions.
So Exposure Compensation will over-ride your light meter settings and make your photos darker or lighter.
Exposure Compensation is on all cameras and it looks like this .
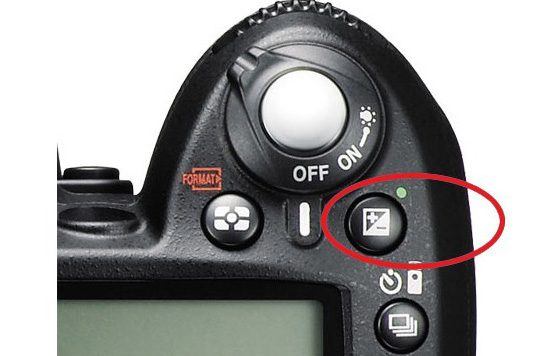
It actually moves your light meter , to the right – ( making your image brighter) , or to the left , making your image darker.

Cameras work by measuring light reflected off your image , they then try to get an overall exposure based on a middle grey tone.
However , life is simply not always grey.
We often have difficult lighting conditions , like bright white snow , or a dark starry night.
We don’t want to make our snow dirty white , or our night skies grey .
So we can dial in some exposure compensation.
What if we are shooting an event outdoors . Kids are running everywhere , the sun is shining and the brightness is in the sky , and our kids faces are just a little grey. Another reason to dial in some exposure compensation.
Enjoy the process and remember you can dial in a little or a lot , depending on the look you choose.


